- A+
Introduction
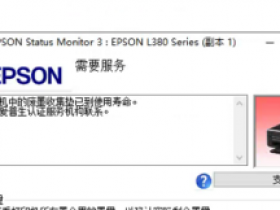
As a printer owner, it’s important to understand that over time, printers produce waste ink which gets accumulated in the waste ink pad or sponge. When this pad is full, the printer will show an error message that the ink pad is full. The Epson L220 printer uses an internal ink pad which collects waste ink during printing, cleaning, and ink charging. Therefore, it is necessary to replace the waste ink pad or sponge to keep the printer running efficiently.
Step-by-Step Guide for Replacing Waste Ink Pad on Epson L220
Replacing the waste ink pad on an Epson L220 printer is a simple task. Follow the steps below:
Step 1: Purchase the Waste Ink Pad
Before removal of the old waste ink pad, you need to purchase the replacement pad. Epson recommends that you purchase the waste ink pad through authorized dealers or service centers to ensure the authenticity of the product.
Step 2: Turn off the Printer
Turn off the printer by using the power button and unplug the cable from the power source.
Step 3: Removing the Printer Cover
Remove the printer cover by opening the scanner unit and unplugging the wire connected to the scanner. Remove the screws using a screwdriver, and lift the cover.
Step 4: Removing the Ink Cartridges and Ink Tube
Remove the ink cartridges gently from the printer, as well as the ink tube from the ink supply unit. Keep them in a safe place because they will be reinstalled later.
Step 5: Removing the Old Waste Ink Pad
Remove the old waste ink pad or sponge and dispose of it properly. Use gloves to avoid contact with the ink as it may cause skin irritation or stains.
Step 6: Installing the New Waste Ink Pad
Insert the new waste ink pad in the specified area and make sure it fits properly.
Step 7: Reassembling the Printer
Reassemble the printer by connecting the ink tube to the ink supply unit and then, reinstalling the ink cartridges. Make sure to follow the instructions carefully to avoid any damage to the printer.
Step 8: Resetting the Waste Ink Pad Counter
After replacing the waste ink pad, it is essential to reset the waste ink pad counter on the Epson L220 printer. You can do this by following these steps:
Press and hold the cancel button, power button, and the ink button simultaneously for about three seconds.
Release all the buttons when the green power indicator blinks and the printer starts to initialize.
The process is complete when the power light stops blinking.
Conclusion
Replacing the waste ink pad on the Epson L220 printer is essential to keep the printer running smoothly. This guide has provided a simple step-by-step process for replacing the waste ink pad on an Epson L220 printer, which will extend the lifespan of your printer for years to come.
- 我的微信
- 这是我的微信扫一扫
-

- 我的微信公众号
- 我的微信公众号扫一扫
-